
How to Create a College Event with Helptivo
Learn how to set up a college club event from start to finish. Create a signup sheet with capacity limits, share the link or QR code with members, and use automatic QR check-in and checkout to track attendance and hours without any manual work.
Volunteering is great.
But organizing it? That's often a hassle.
Tracking member participation turns into a wild goose chase: attendance sheets get lost. Participation records are scattered across spreadsheets, Google Forms, and scattered lists. It becomes chaotic not just for the members but also for the club officers.
Clubs are built to serve communities, not to manage paperwork.
They need automation.
And this is where Helptivo steps in.
Step 1: Creating an Event
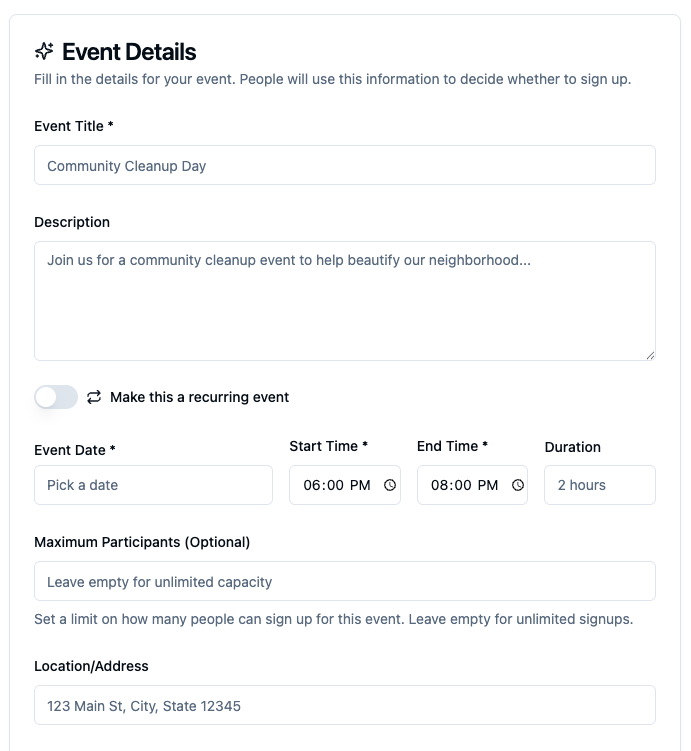
Creating an event in Helptivo
The process begins in the "Events" tab.
An officer logs into their Helptivo account and clicks "Create Event" in the top right corner.
They can enter the title, date, time, location, and description. Then they set a capacity limit. Once the limit is reached, registration closes automatically.
There are options to set custom questions (for example, asking about dietary restrictions).
The event automatically generates a dedicated event page alongside a QR code and shareable link, which directs members to this page, where they can read full event details and RSVP in one place.
"The fact that Helptivo automatically generates a full event page makes a huge difference. It saves us a bunch of time, and members know exactly what they're signing up for."Liana, Programming Director
Everything is centralized. No need for constant monitoring, printing out flyers, and sending out Google Forms.
Step 2: Registering for Events
Members scan the QR code or open the event link.
They are taken to the event page, where they can review all details and confirm their RSVP. Once they submit, their information is recorded directly into the dashboard, where club officers can view who has signed up for the events.
There is no hassle. No copying names into spreadsheets. No transferring data between platforms.
Everything lives in one system.
"We used to send separate messages with one explaining event details and another taking RSVP. Now everything is on the event page. It feels so organized."Liam, UCSD Student
Step 3: Taking Attendance
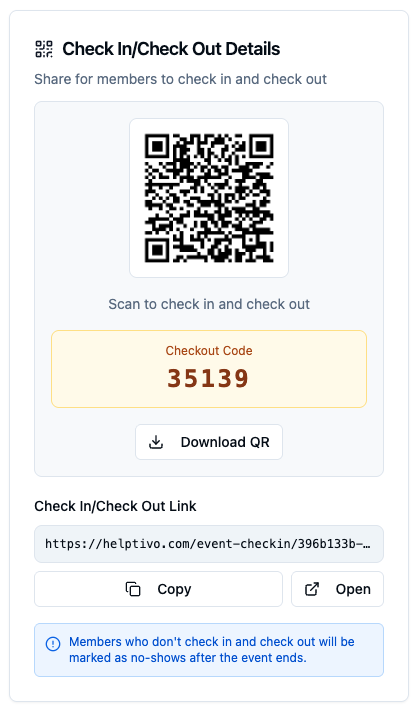
QR check-in code
On the day of the event, officers display a Check-In QR code.
Members scan when they arrive. The system records the exact time automatically.
No paper sheets. No data entry afterward.
When the event ends, members scan the Check-Out QR code. Helptivo calculates the duration of attendance instantly.
What used to require manual time and effort now happens in seconds.
"After our service events, we used to need to stay behind calculating hours and uploading the data to spreadsheets. Now it's automatically recorded!"Alex, Volunteer Coordinator
Once attendance is taken, each member's volunteer hours are automatically added to their individual profile.
Each profile includes:
- Total volunteer hours
- Event attendance history
- Participation records
For officers, this creates full visibility in one centralized dashboard.
They can manage all members and their volunteer hours in one place, being able to view which events members participated in and their participation hours.
"Everything is all organized in one place; it's so much more convenient."Alex
Results
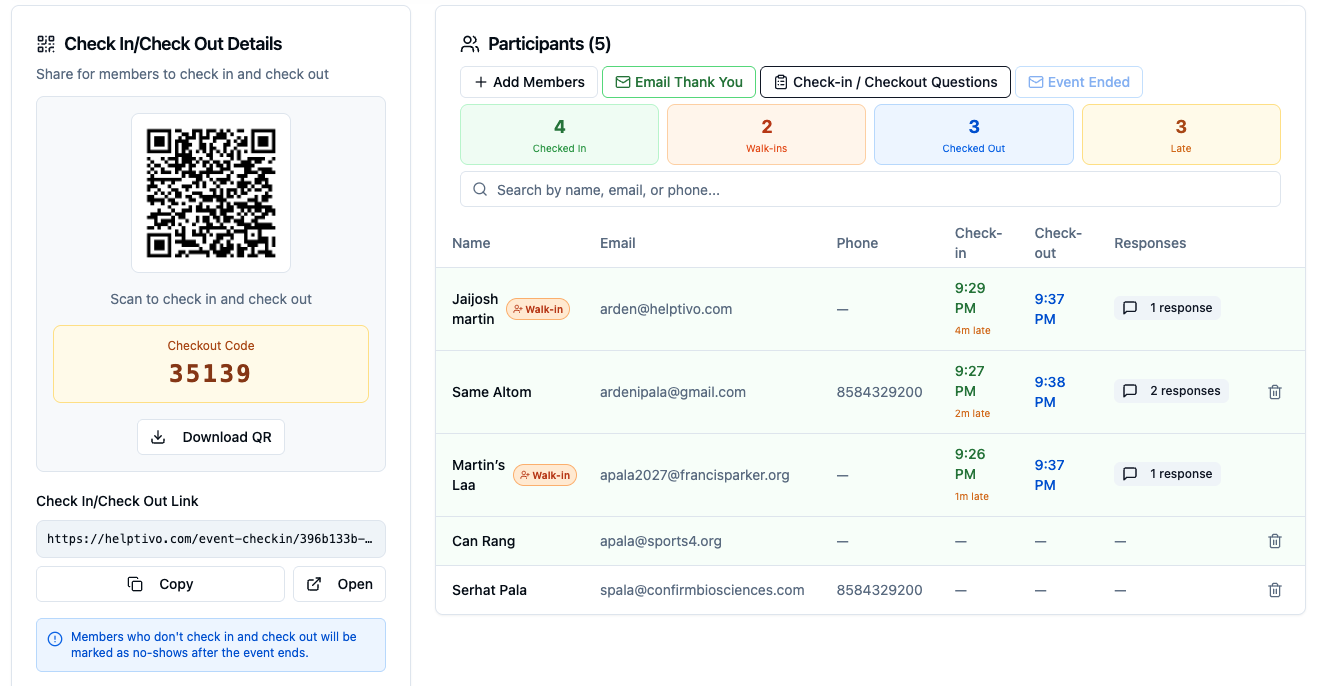
Attendance tracking results in Helptivo
Helptivo makes event management easy.
Administrative work decreases, and volunteering remains the focus, saving organizations both time and energy.
Ready to create your first event?
Start using Helptivo for free. No credit card required.